[toc]
Guide to making your own hamster bin cage
A bin cage can make the perfect enclosure for your hamster to run around in as it is spacious and if they do start to outgrow it, they can be easily extended by stacking and connecting other bin cages to it. Despite the name, however, bin cages are not made from old garbage holders, but large plastic storage boxes.
This guide explains how to make a DIY hamster bin cage in step by step stages. Bin cages are simple to make (providing you have the right sized box and equipment) and are popular for hamsters as they are spacious, easy to open and effortless to clean.
Bin cages are cheap to make in comparison to the prefabricated ones that you can buy at the pet store, which means that you can spend the money you have saved on hamster toys and accessories.
So, if like us, you are fed up of forking out dollars on inadequate hamster cages that are too small, difficult to place your hand through and a pain to clean out, then a bin cage could be the perfect solution. Here we will explain how we made one.
How many litres should a hamster bin cage be?
A bin cage should be at least 20 x 30 inches, taking up 600 sq. inches of total floor space and over 100 liters in size. You can measure the box by multiplying the bottom inside width by the bottom inside length. That said, the size of the bin cage you choose to make will ultimately depend on the size of your hamster. And, whilst big is best, you need to remember that you will need to sit your bin cage somewhere safe and secure once made.
You should also bear in mind the height of your hamsters’ wheel when considering the depth of the box you want to use. If your hamster is a burrower, then you will also need to account for a deep layer of substrate.
Step by step guide to making a hamster bin cage
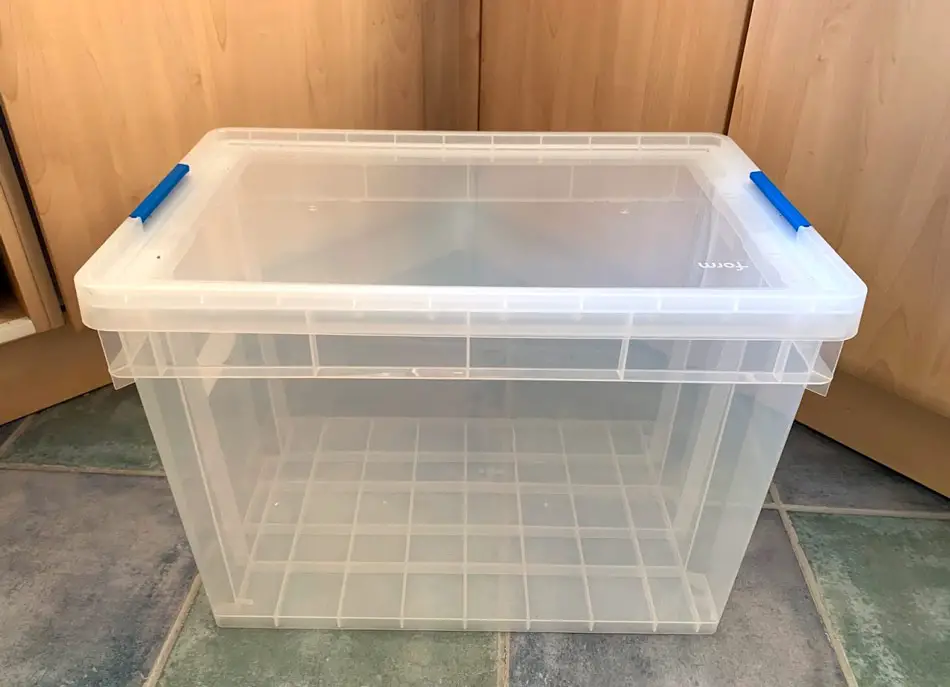
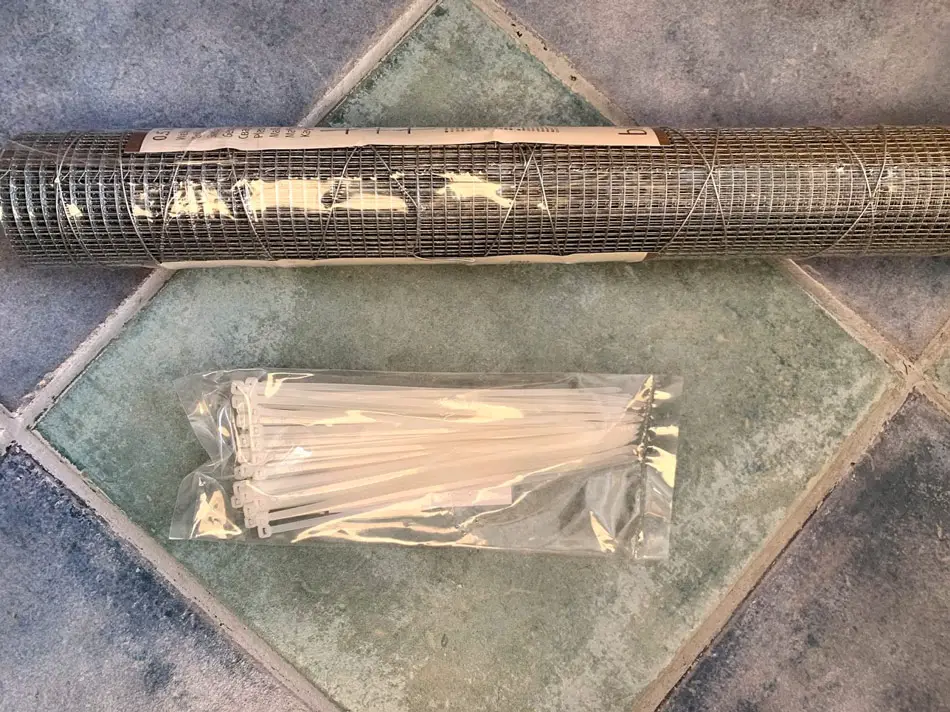
In order to make a hamster bin cage, you will not only need a large plastic storage box but equipment including a marker pen, box cutter or jigsaw, power drill, wire cutters, cable ties, sandpaper and mesh. If you are making this as a family, please ensure that there is parental supervision at all times.
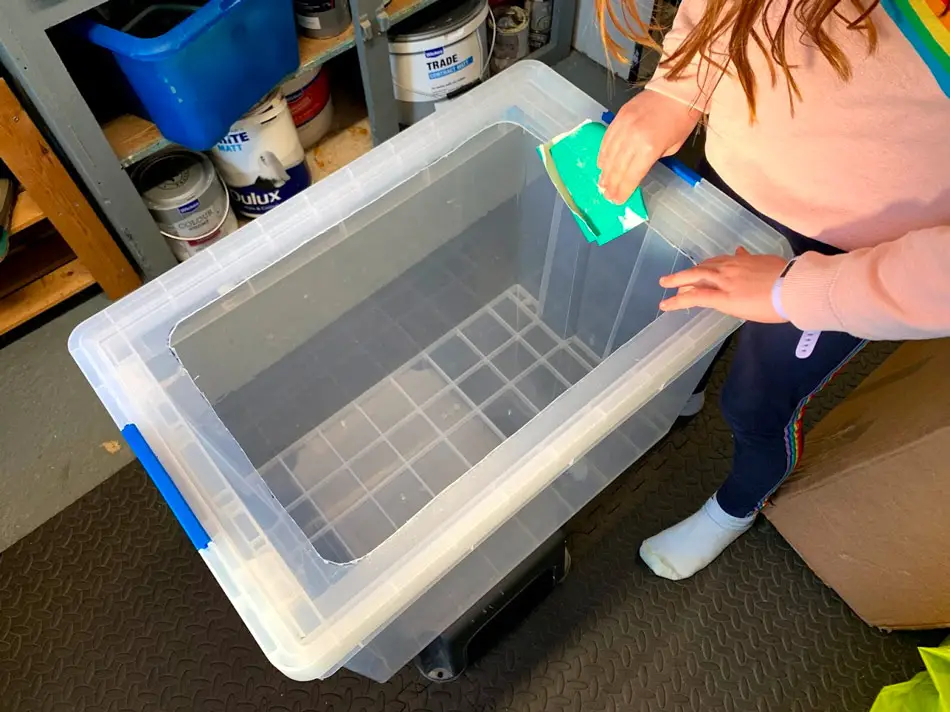
Top tip – select a plastic storage box that has a smooth lid, as the textured ones crack easily. Trust me, we got through quite a few plastic bins in pursuit of the perfect hamster pad. For this reason, we would highly recommend the Sterilite Storage box (see at Amazon).
1. Decide where to use wire mesh (lid is best)
It is really important that your bin cage is well ventilated, so you need to decide where you will place your wire mesh. The easiest location is on the lid, so for the purposes of this guide, we will be making a bin cage with a wire mesh lid. Alternatively, you could cut out one of the side panels or drill holes all around the box to ensure that there is enough air circulating through the cage. If you are interested in using this technique, then we explain it further below.
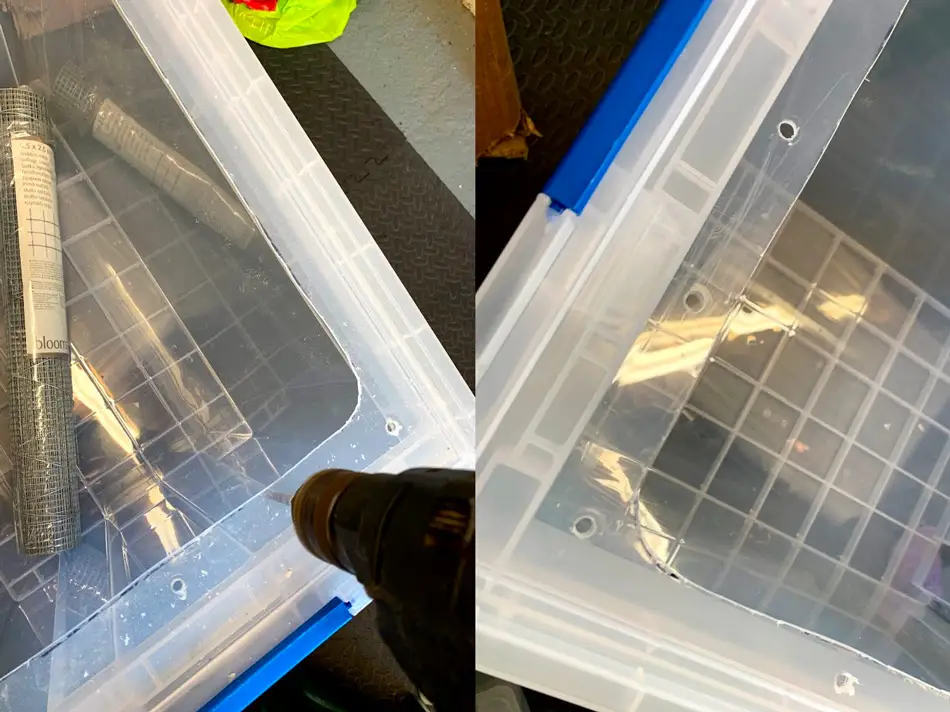
2. Draw an outline for the wire mesh
Place the lid face down and using your marker pen, draw an outline of exactly where you want to put the wire mesh. Make sure that the rectangle has a wide enough perimeter (around an inch) so that the lid does not snap whilst you are cutting it. This also allows plenty of room for cable ties to be added after.
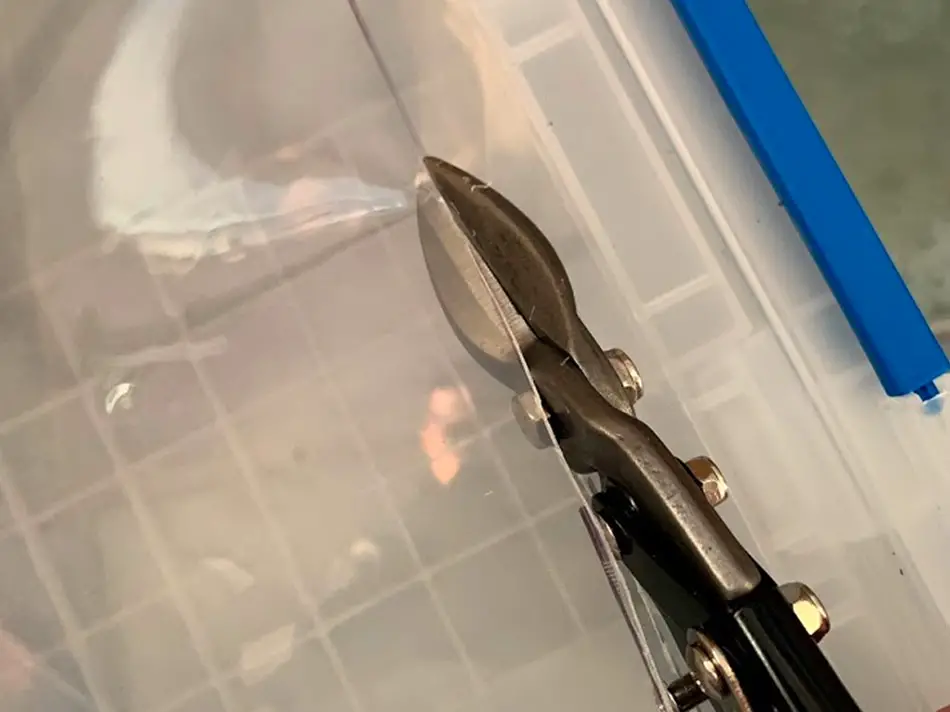
3. Use a drill to make some starter holes
Drill some starter holes along the visible line, before cutting out the inside of the box using a jigsaw or box cutter. Once you get going, you may find it easier to use scissors.
4. Mark where you want to use cable ties for wire mesh
Once you are left with the perfect hole, using your marker pen once more, mark out where exactly you plan to place the cable ties that will affix the mesh to the plastic. We would recommend using as many cable ties as possible as you do not want your hamster to chew through them or find any small gaps to squeeze through. Use your power drill to make the holes but be careful not to crack the lid. The type we like to use are these cable ties available at Amazon as they are incredibly robust.
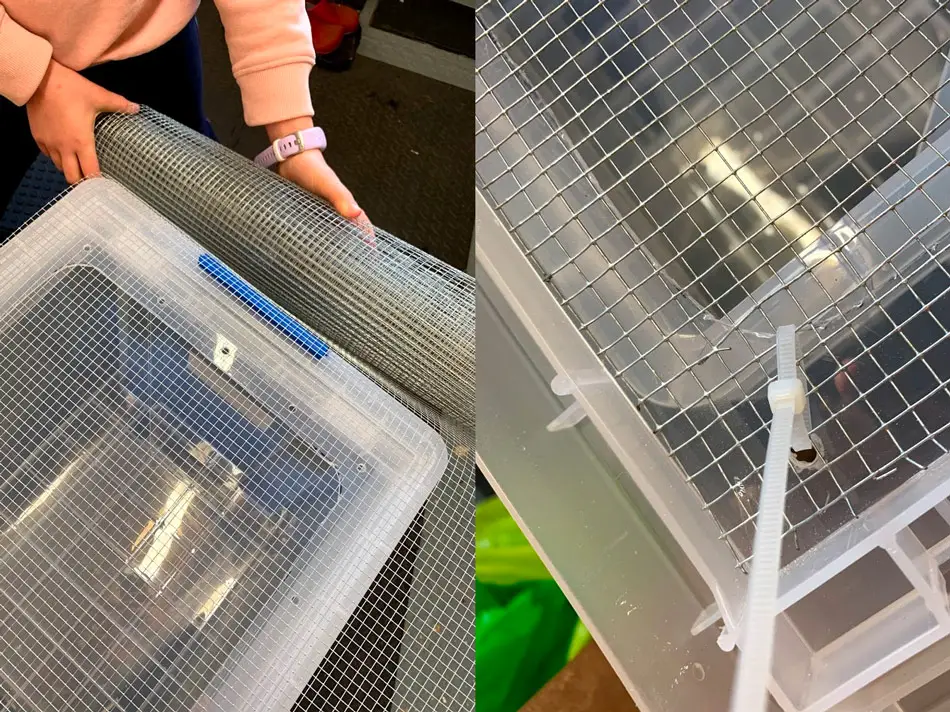
5. Cut wire mesh
Now you need to cut your mesh to fit your lid. Measure around the top accordingly, making sure that the mesh is slightly bigger than the hole so that it can safely overlap the sides and not slip through.
6. Check for sharp edges and smooth down with sandpaper
Having cut out your mesh you need to check for sharp or rough edges before either smoothing them out with sandpaper or covering them over with duct tape.
7. Attach mesh to the lid using cable ties
Now is the time to attach the mesh to the lid using your cable or zip ties. Make sure to pull them tight before snipping all the ends off using these wire cutters (at Amazon).
8. Fit water bottle externally to stop hamster chewing
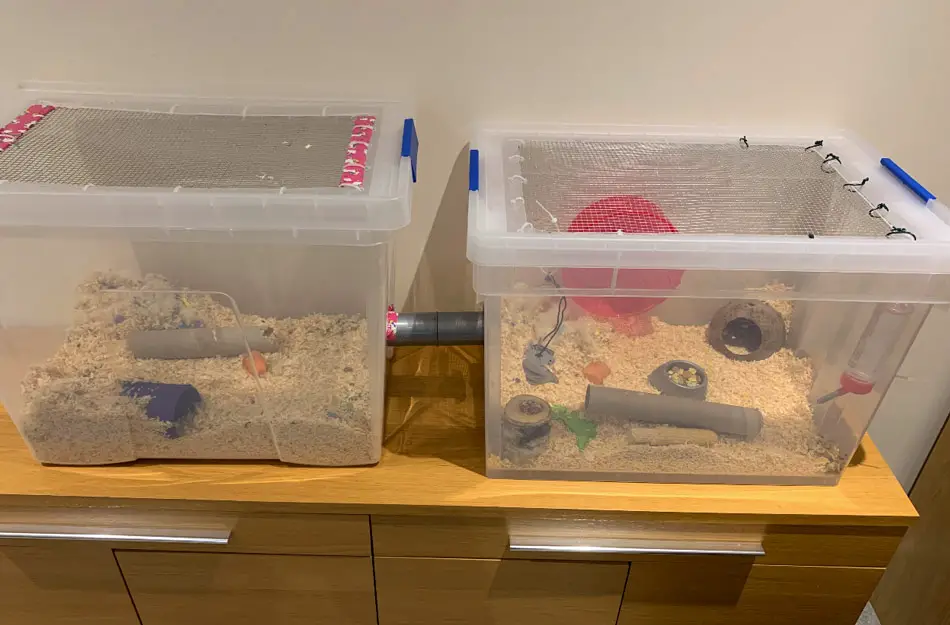
For the water bottle, you can either place it inside or outside of the bin cage. Ours currently sits on the inside, however, Oscar is prone to chewing through his water bottle, so if we were to make another one, we would probably fit it externally.
Either way, the best way to add a water bottle is to lie it roughly where you would like it to sit, and mark out two holes either side. Make sure that the spout is at least 1-1.5 inches up from where the bedding will reach, making it easier for your hamster to drink.
Having drilled your holes, use some wire support to hold it in place. If you are adding your water bottle to the outside of the bin cage, then you will need to drill a larger hole for the spout to go through – making sure the hole is slightly larger so that it can easily be pulled in and out for refilling purposes.
9. Drill hole for hamster wheel
Finally, if you have a hamster wheel that clips onto a cage (rather than a freestanding one), then you will also need to cut a hole out for this. Cut it just big enough to feed the wheel screw through and then do it up by fixing the tightening mechanism to the outside of the bin cage.
Using mesh for the bin cage lid
Since making our bin cages and through trial and error, we have learnt that having two windows in the lid rather than one large hole makes the plastic around it a lot more stable.
When choosing which mesh to buy, we would also recommend going for one with small squares, so that your contortionist hamster cannot escape such as this wire mesh (available at Amazon).

How to make a hamster bin cage without mesh
It is not compulsory to use mesh for your bin cage, but in order to ensure adequate bin cage ventilation, you will need to drill holes in your plastic storage. A word of warning though, you will need to ensure that you have plenty of holes across your bin cage, making sure that they are at least 3 inches from the bottom so that the bedding and substrate do not cover them up or push through. If your hamster is a burrower then a bin cage with a mesh lid might be a better solution!
Ideally, you want holes at hamster head height and then closer to the top of the bin cage too, although you can place them sporadically so that they get a nice breeze blasting through. The more holes the better the hamster bin cage ventilation, although be careful when cleaning out.
Bin cage vs wire cage
There are many benefits to buying a normal wire hamster cage. Wire bars offer great ventilation and prevent moisture from building up too quickly in the bedding. However, a wire cage does not keep little fingers or paws from poking through like a solid plastic bin cage can, and many wire cages come with a host of detachable tubes and trays that are fiddly to fix and clean.
Mess is a problem with a wire cage too and proved to be the thing that tipped me over the edge having just had a new carpet fitted in our sitting room. The constant kicking of dirty bedding on to the floor is no longer an issue thanks to our bin cage. Plus, even our kids will clean out our bin cage as it is so easy to do. In a matter of minutes or a quick tip, the bin cage is empty and is straightforward to wipe out and clean.
Finally, if you have a hamster who likes to burrow than a bin cage gives you plenty of depth and is less drafty in the colder months.
Adding floors in a hamster bin cage
You can get as creative as you like when it comes to adding floors or extra rooms to your hamster’s cage. Some people like to stack bin cages on top of each other (this certainly saves space) or if you have the room you can place them side by side. You could even add different levels inside your bin cages using bits of wood or plastic and affixing them with wire to give your hamster plenty of places to explore.
Oscar absolutely adores his bin cage and after living in it for a few months, we added an additional bin cage, that we joined via a metal tunnel (bought at our local pet store). The tunnel is kept in place between the two bin cages by duct tape, which we easily unpeel when it is time to clean him out.
Conclusion
When researching bin cages for Oscar, I saw some fabulous designs. From disused dolls houses to old chests of drawers, as long as you find something spacious that has enough ventilation then you can create some wonderful homes for your hamster.
Just remember, however, that one of the main benefits of building a bin cage is to make life simpler for you, so if you do decide to go slightly more elaborate just consider how you will clean the cage out and have much access you will have to your hamster.
We would thoroughly recommend building your own bin cage. It is fun, something the whole family can get involved in and can even save you money in the long run.